Complete Step-by-Step Timeline: Septic System Installation from Permit to Finish
Planning a septic system installation requires understanding a detailed process that typically spans 6-8 weeks from initial site evaluation to final approval. Over 25 million American homes rely on septic systems for reliable wastewater treatment, making proper installation timeline planning crucial for homeowners coordinating with construction projects or replacing an existing system.
Understanding each phase of the septic system installation process helps property owners budget appropriately, coordinate with contractors, and set realistic expectations. Whether you're installing a new septic system for a home build or replacing a failed system, this comprehensive timeline will guide you through every step from soil testing through final inspection. Knowing what to expect at each stage prevents costly delays and helps you coordinate with other construction activities happening on your property.
Septic System Installation Timeline Overview
A complete septic installation timeline spans approximately 6-8 weeks from start to finish depending on workload, with specific phases requiring careful coordination. The soil testing and percolation phase typically requires 2-3 weeks, while permit acquisition and design approval takes another 2-3 weeks. The actual excavation and installation phase moves more quickly at 1-2 weeks, followed by final inspection and approval requiring 3-7 days. Understanding this overall timeline helps you plan other construction activities and set realistic move-in dates for new construction projects.
This timeline matters significantly for homeowners because septic system installation involves multiple regulatory approvals, weather dependencies, and site-specific challenges that can extend the process. Understanding each phase helps you plan effectively and avoid costly delays that could impact other construction activities. Many homeowners underestimate the time required for permitting and approvals, leading to construction delays that could have been prevented with better planning.
The installation process involves several key phases that build upon each other. Initial site assessment and soil testing occurs first, establishing the foundation for all subsequent work. Permits, planning, and design approval are next, ensuring regulatory compliance and proper system design. Excavation and site preparation happens when plans are approved by the State of NH and town, preparing the property for installation. Septic tank and system installation are next, when the actual components are put in place. Inspections and approvals by the town and State of NH are required before the system can be backfilled. Home owners can use their bathrooms normally when the septic system is being replaced, there may be a three-four hour period when the tank is being replaced/installed when water cannot be used.
Phase 1: Initial Site Assessment and Soil Testing
The septic system installation process begins with a comprehensive initial site evaluation and test pit that determines system feasibility and design requirements. Professionals assess property conditions including existing structures, utility locations, and optimal system location relative to property lines and wells. This critical assessment phase identifies potential challenges early in the process, allowing for proactive planning that prevents costly surprises during installation.
A percolation test is scheduled and executed, a critical step that measures soil absorption rates. This test requires digging test holes and monitoring water infiltration, providing essential data for system design. The test pit is a critical step in the initial process, this determines the seasonal high water table.
Soil analysis and absorption rate testing continue, determining whether conventional systems will function effectively or if alternative system designs are required. These tests provide detailed information about soil composition, layering, and drainage characteristics that directly impact system design. Poor test results don't necessarily mean you can't have a septic system—they simply mean you'll need a more sophisticated system design to handle your property's specific soil conditions.
Percolation Test Requirements
The percolation test measures how quickly water moves through soil, directly impacting septic system design and sizing. During this process, technicians fill test holes with water and measure infiltration rates at specific intervals. The rate at which water percolates through the soil determines how large your drainfield needs to be and what type of distribution system will work most effectively on your property.
Soil texture analysis accompanies the percolation test, evaluating filtration capability and determining appropriate system components. Technicians examine soil samples to understand composition, identifying the proportions of sand, silt, and clay that make up your soil. This information helps engineers design a system that works with your soil's natural characteristics rather than fighting against them.
Test results determine system type and sizing requirements. Sandy soils with rapid percolation may require different distribution methods than clay soils with slower absorption rates. If initial test results fall outside acceptable ranges. Multiple test locations across your property help identify the optimal placement for your system, ensuring the best possible performance.
Soil Classification and System Design
Soil conditions significantly impact both installation timeline and system complexity. Sandy soil installations typically proceed faster due to easier excavation and predictable drainage patterns. These soils allow for straightforward conventional system designs that have been proven effective over decades of use. Clay soil installations may require additional engineering and alternative system components.
Poor soil conditions may necessitate alternative systems like mound systems or aerobic treatment units, requiring additional design time and specialized installation techniques. These advanced systems cost more and take longer to install, but they allow properties with challenging soil conditions to have functional septic systems where conventional designs would fail.
Phase 2: Permits, Planning, and Design Approval
System design creation and engineering plans development occur, incorporating soil test results and site conditions into a comprehensive installation plan. Engineers use the data collected during soil testing to design a system specifically tailored to your property's characteristics and your household's wastewater treatment needs. The septic system design must account for household wastewater volumes, soil conditions, and local regulations to ensure optimal performance throughout the system's lifespan.
The plans are submitted to the state and town, requiring detailed documentation of the proposed installation. This documentation includes engineering drawings, soil test results, property surveys, and detailed specifications for all system components. The permit review and approval process, with New Hampshire specific permit requirements dictating timeline expectations. Proper coordination of necessary permits helps avoid delays that could extend the installation process significantly.
Local Regulations and Code Compliance
Londonderry, NH specific septic regulations establish minimum setback requirements from wells, property lines, and buildings that directly impact system location and design. These regulations exist to protect public health and groundwater quality, ensuring that septic systems don't contaminate drinking water sources or create nuisances for neighboring properties. State of New Hampshire septic system installation codes require compliance with specific technical standards for tank installation, pipe placement, and system components.
Setback requirements typically mandate minimum distances of 75 feet from wells, 10 feet from property lines, and 20 feet from structures. These requirements can significantly constrain system placement on smaller properties or lots with unusual configurations. Violations of these requirements can add weeks to the timeline while engineers redesign systems to meet local health department regulations. Understanding these constraints early in the planning process prevents costly delays and redesign work.
Design Approval Process
Engineer stamp requirements vary based on system complexity, with conventional systems often requiring simpler approval processes than alternative systems. A licensed engineer must review and approve system designs, certifying that they meet all applicable codes and will function properly given the site's specific conditions. The health department reviews submitted plans within 5-10 business days typically, though complex installations may require additional review time as regulators ensure all requirements are met.
Potential revision requests can extend the permitting process if initial designs don't meet regulatory requirements. Common issues include insufficient setbacks, inadequate system sizing, or design elements that don't comply with current codes. Resubmission timeline adds another review cycle, potentially extending permit approval by 1-2 weeks. Building permit coordination becomes crucial for new construction projects where septic system installation must align with overall construction scheduling to avoid delays that affect the entire project.
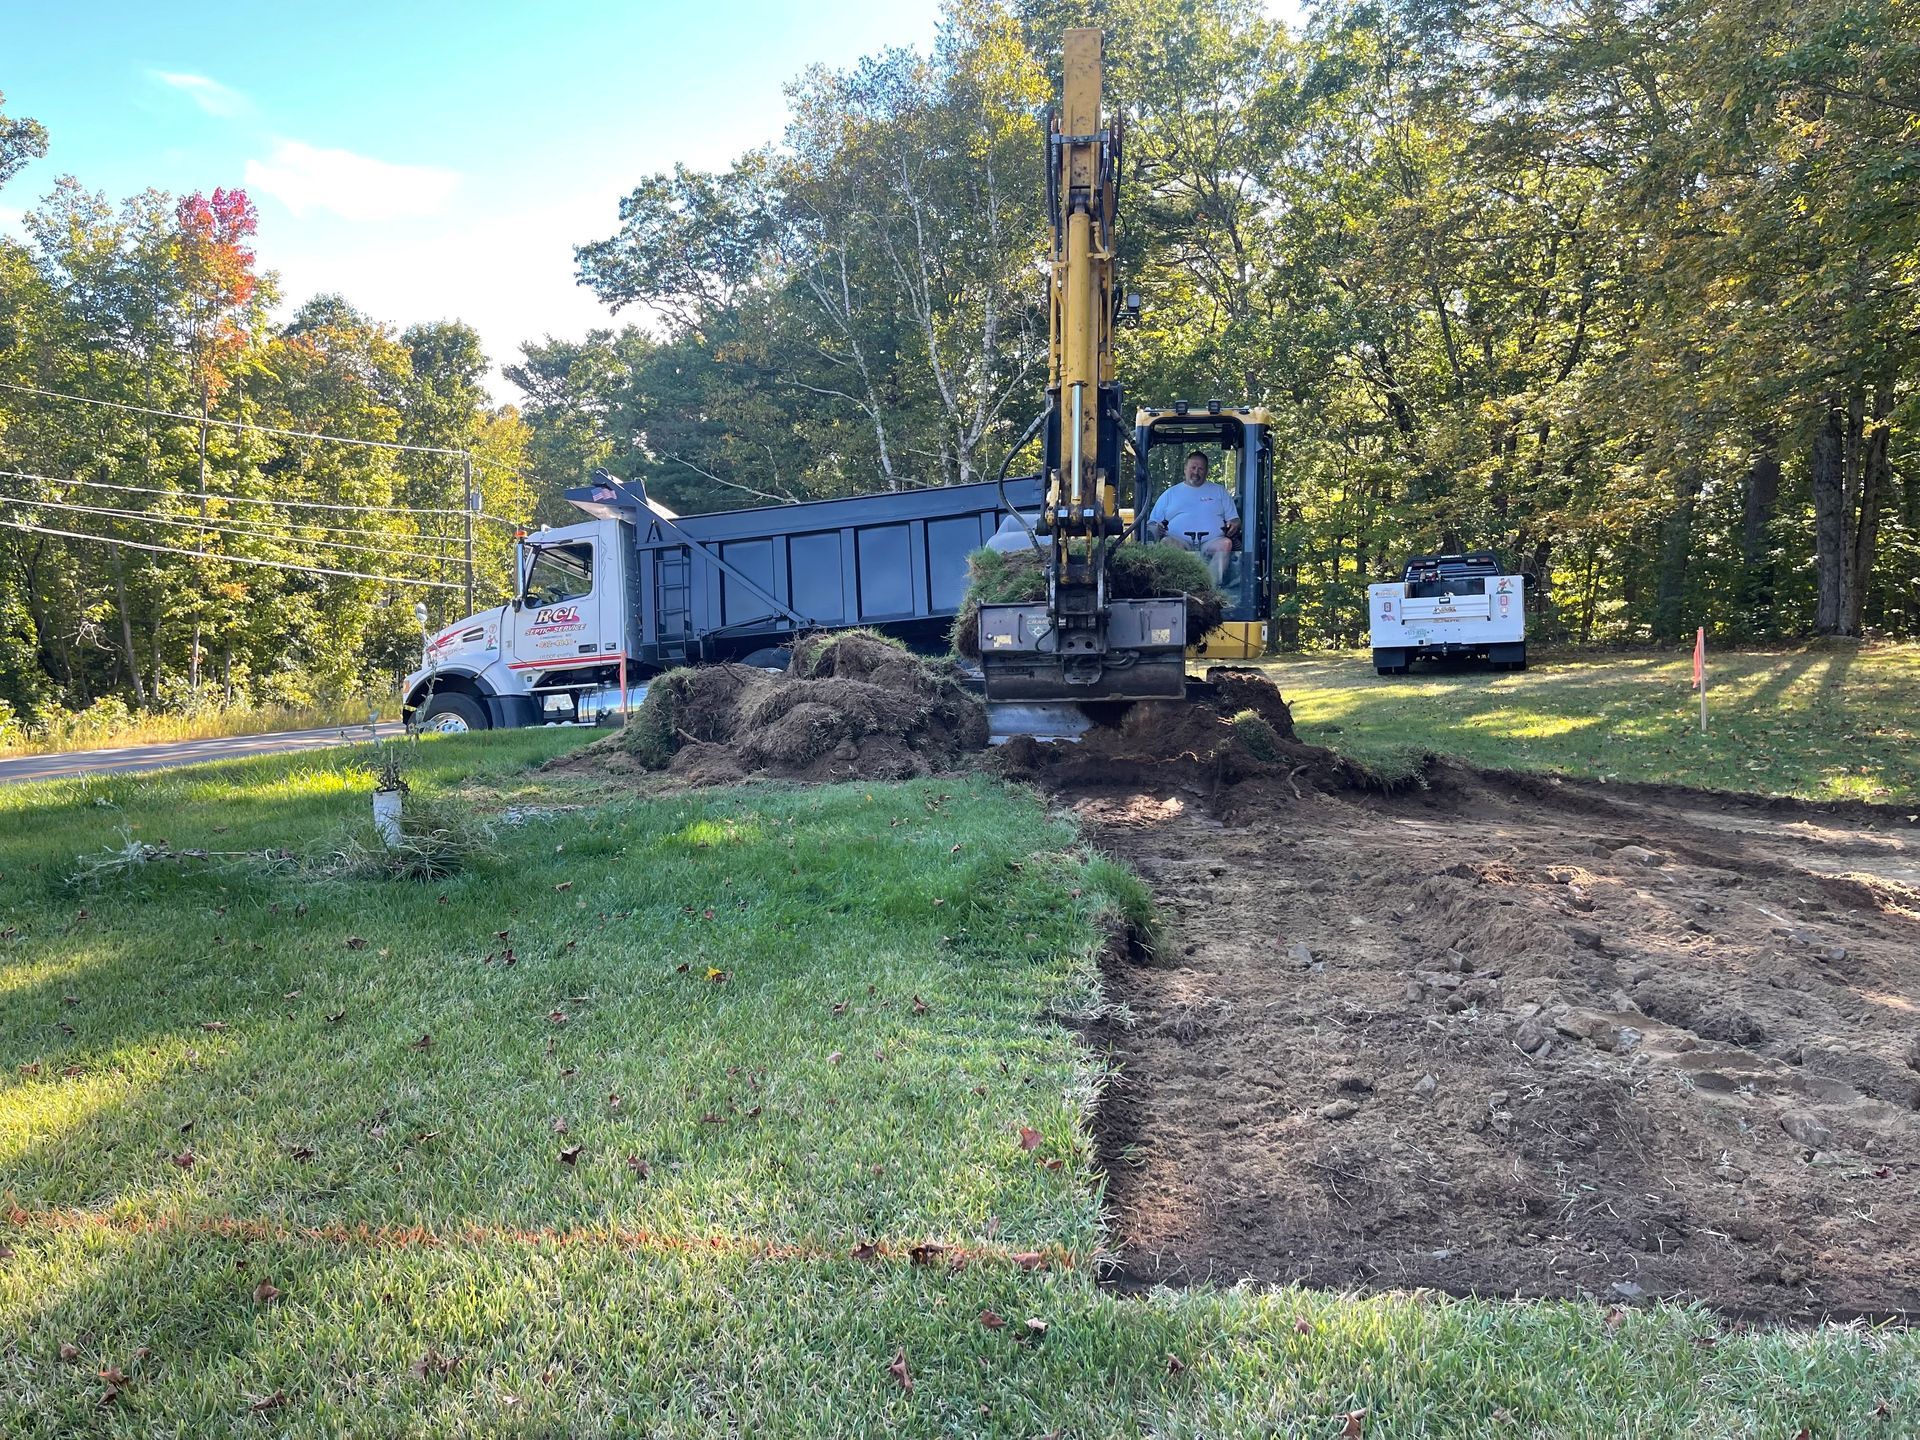
Phase 3: Excavation and Site Preparation
Site marking and utility location occurs during the beginning of the excavation phase, ensuring safe access to underground infrastructure. Professional utility locating services identify buried electrical lines, water pipes, gas lines, and telecommunications cables that could be damaged during excavation. Proper utility marking prevents damage to existing systems and ensures contractor safety during digging operations. Excavation of the septic tank location typically requires days 3-5, depending on soil conditions and access challenges.
Leach field area excavation and preparation continues, requiring precise grading to ensure proper drainage and system function. The drainfield must be excavated to exact specifications, with proper slope and depth to ensure even distribution of effluent across the entire absorption area. Weather delays and seasonal considerations can significantly impact this phase, with frozen ground conditions potentially extending excavation timelines. Site accessibility challenges, including narrow access roads or steep terrain, may require specialized equipment and extended timeframes.
Excavation Challenges and Timeline Impacts
Rocky soil conditions can add to excavation schedules as contractors encounter unexpected subsurface obstacles. Large rocks or ledge can require specialized rock-breaking equipment or alternative system placement when excavation becomes impractical.
Tree removal and root system management can add additional time when existing vegetation interferes with optimal system placement. Large trees near the installation site may need to be removed, and extensive root systems must be cleared to prevent future interference with system components. Steep terrain and equipment access issues may require specialized excavation equipment or alternative access routes. These challenges can extend the excavation timeline and increase installation costs, particularly when standard equipment cannot reach the installation site effectively.
Site Preparation Requirements
Proper grading for gravity flow systems ensures reliable wastewater movement through the system without mechanical assistance. Gravity systems are simpler and more reliable than pump systems, but they require precise grading to ensure wastewater flows consistently from the house through the tank and into the drainfield. Utility line protection and relocation may be necessary when existing infrastructure conflicts with optimal system placement. Existing water lines, electrical cables, or other utilities may need to be moved or protected during excavation and installation.
Landscape preservation planning helps minimize property damage during installation while maintaining site functionality. Careful excavation planning can preserve mature trees, established gardens, and other landscape features that homeowners want to protect. Material delivery scheduling must coordinate with excavation progress to ensure components arrive when needed without creating site access issues. Proper sequencing prevents delays and reduces material handling costs throughout the installation process.
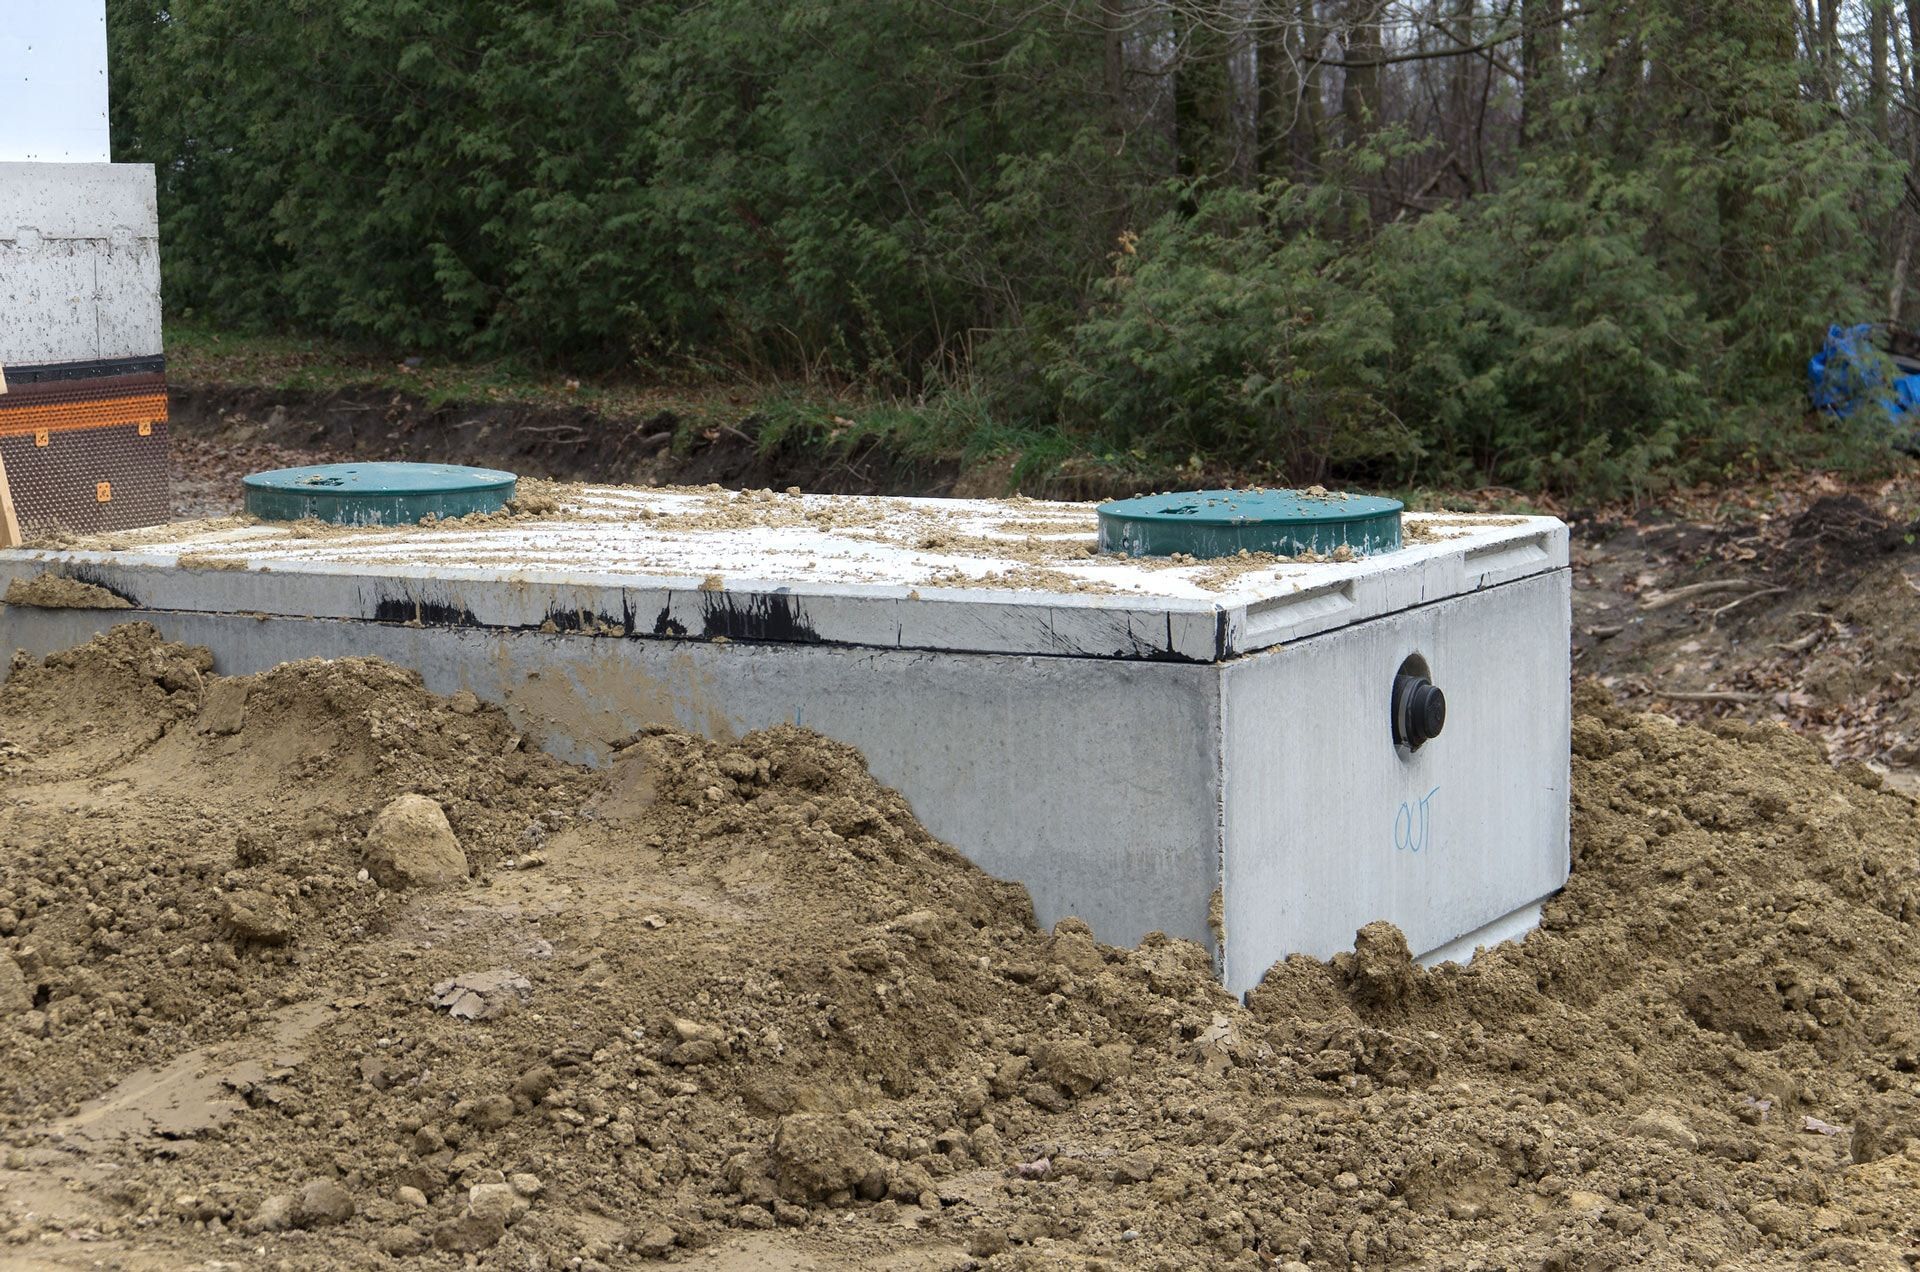
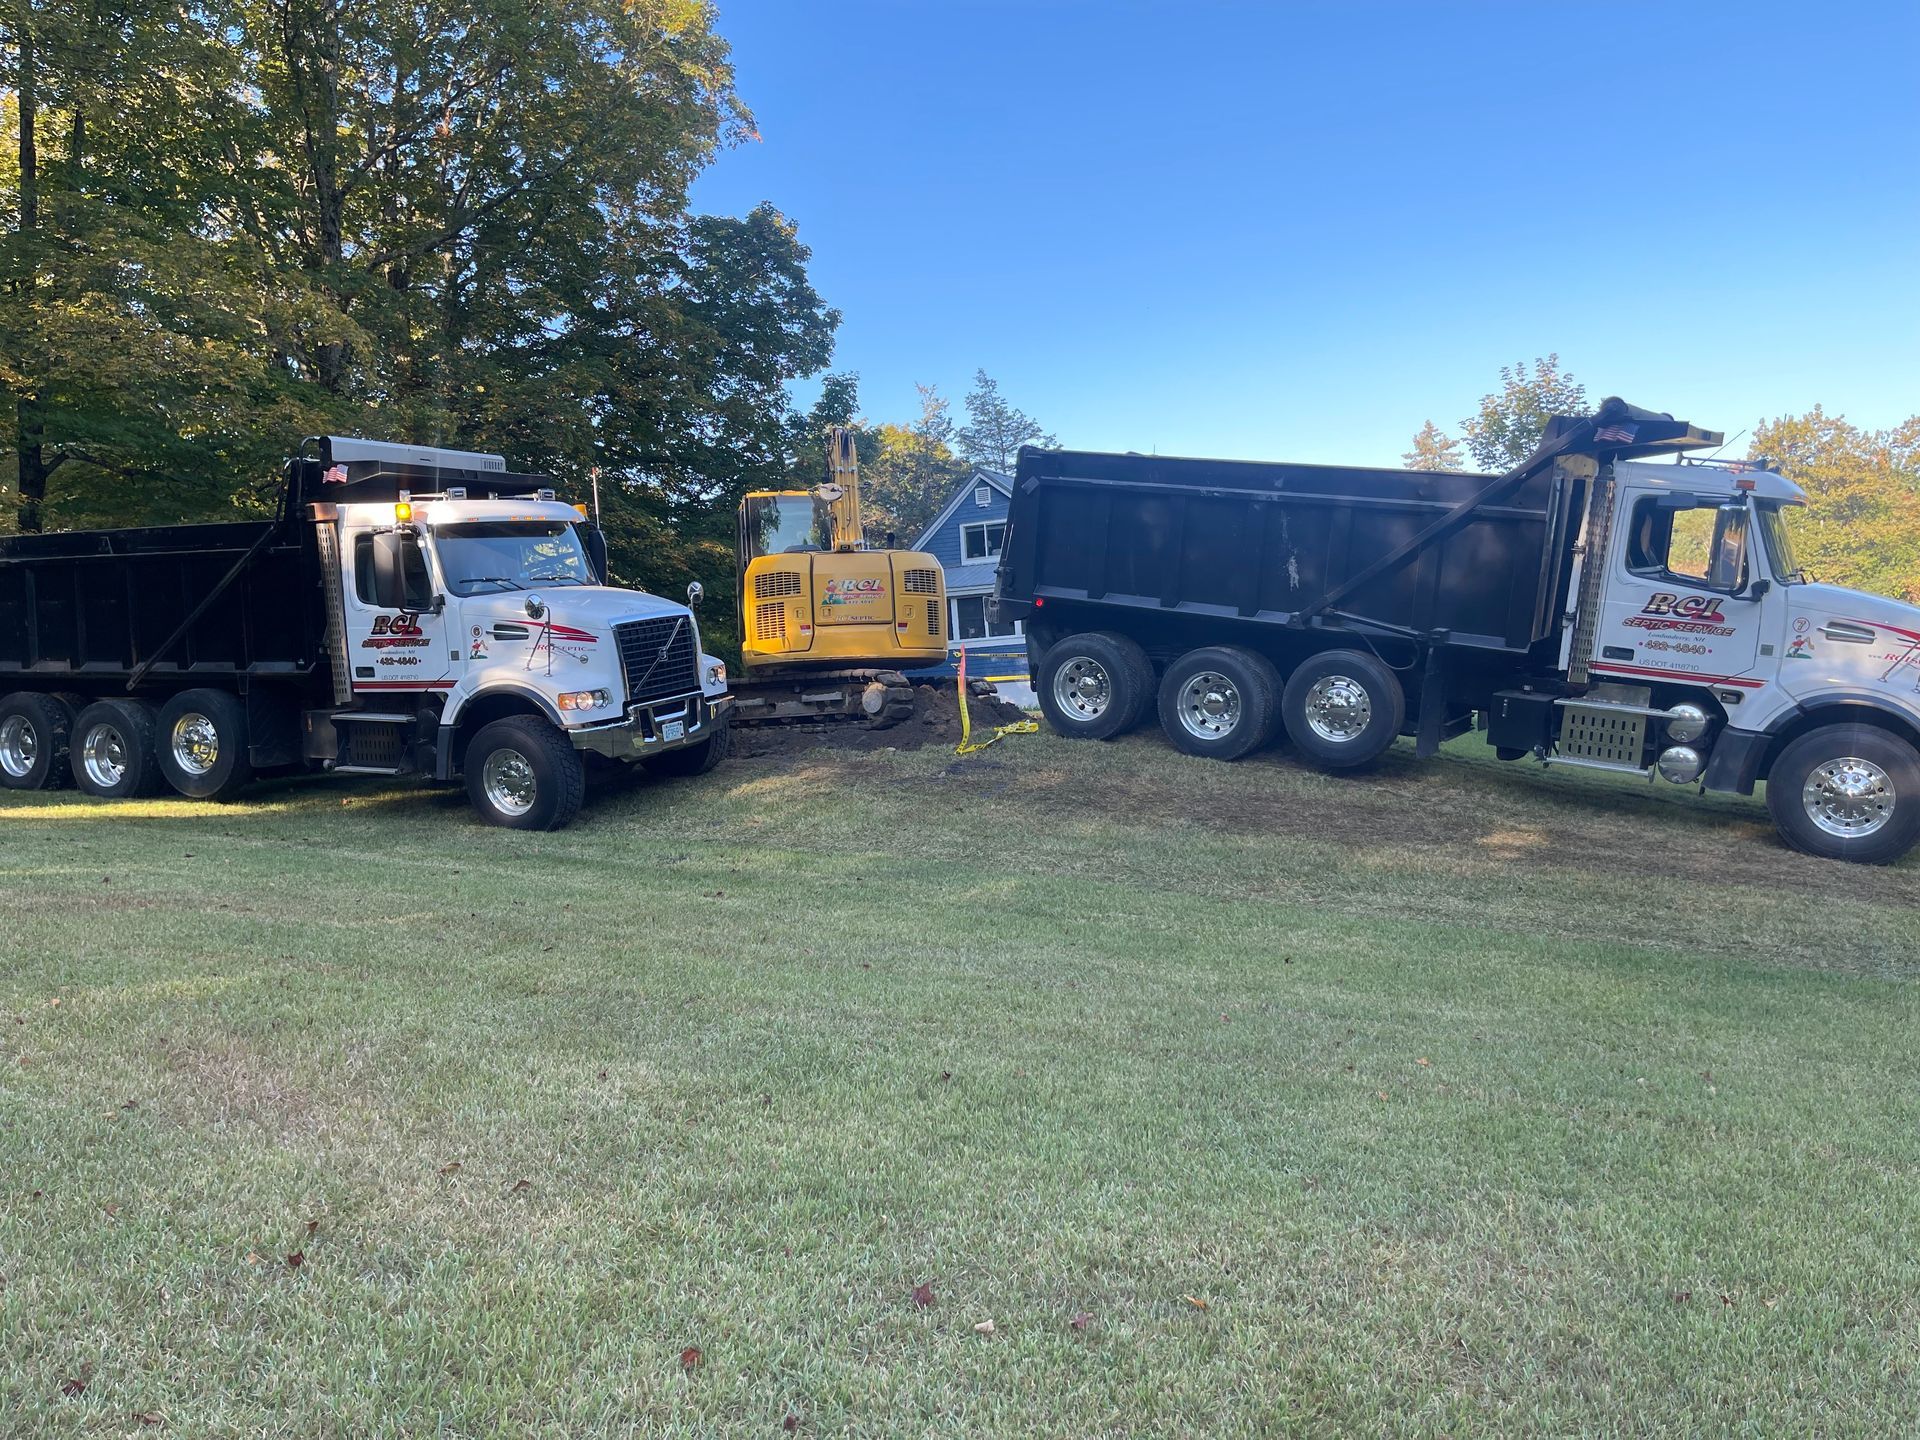
Phase 4: Septic Tank and System Installation
Septic tank delivery and placement occurs first in the installation phase, requiring crane operation for proper positioning. Large septic tanks can weigh several tons, making crane operation necessary for safe and accurate placement. Tank leveling and inlet and outlet pipes connections follow precise specifications to ensure proper system function. Even small deviations from level can affect how the tank operates and how long it will last.
Concrete tanks, fiberglass units, and plastic alternatives each require specific installation techniques and timeline considerations. Concrete tanks offer durability and longevity but require heavy equipment and careful handling. Fiberglass tanks are lighter and easier to install but must be properly supported to prevent cracking. Leach field installation and pipe laying continues after the tank is placed, establishing the distribution network that processes effluent from the septic tank. Distribution box and pump installation may be required for more complex system designs, adding mechanical components that require additional installation time and electrical connections.
Tank Installation Specifics
Concrete vs fiberglass vs plastic tank installation differences impact both timeline and installation requirements. Concrete tanks require larger cranes and more careful maneuvering due to their weight, while lighter tanks can sometimes be placed with smaller equipment. 1000-gallon, 1250-gallon, and 1500-gallon tank options require different crane capacities and site access considerations. Household size and wastewater volume determine appropriate tank size, with larger households requiring larger tanks to ensure adequate retention time.
Crane operation and safety procedures add precision requirements that extend installation time but ensure proper placement. The tank must be positioned exactly level in both directions, with inlet and outlet connections at precise elevations. Connection to house plumbing typically requires coordination with other contractors and may extend the timeline when existing plumbing requires modification. The house sewer line must connect seamlessly to the tank inlet, requiring proper slope and secure connections. Proper inlet and outlet pipes alignment ensures reliable system function and prevents future maintenance issues.
Leach Field Construction
Pipe installation in gravel beds typically requires 1-2 days for proper placement and grading. Traditional pipe-and-gravel systems use perforated distribution pipes surrounded by clean gravel that allows effluent to disperse into the surrounding soil. Chamber system installation offers alternative timeline advantages over traditional pipe and gravel systems in certain soil conditions. Chamber systems use plastic chambers instead of pipe and gravel, often installing faster while providing equivalent or superior performance.
Distribution box placement and connections ensure even effluent distribution throughout the leach field area. The distribution box receives effluent from the septic tank and divides it equally among multiple distribution lines, preventing overloading of any single area. Alternative system installation, including mound systems and raised bed configurations, extends timeline requirements due to increased complexity. These systems may require additional site preparation and specialized installation techniques that add time to the standard installation schedule, but they enable septic systems on properties where conventional installations would fail.
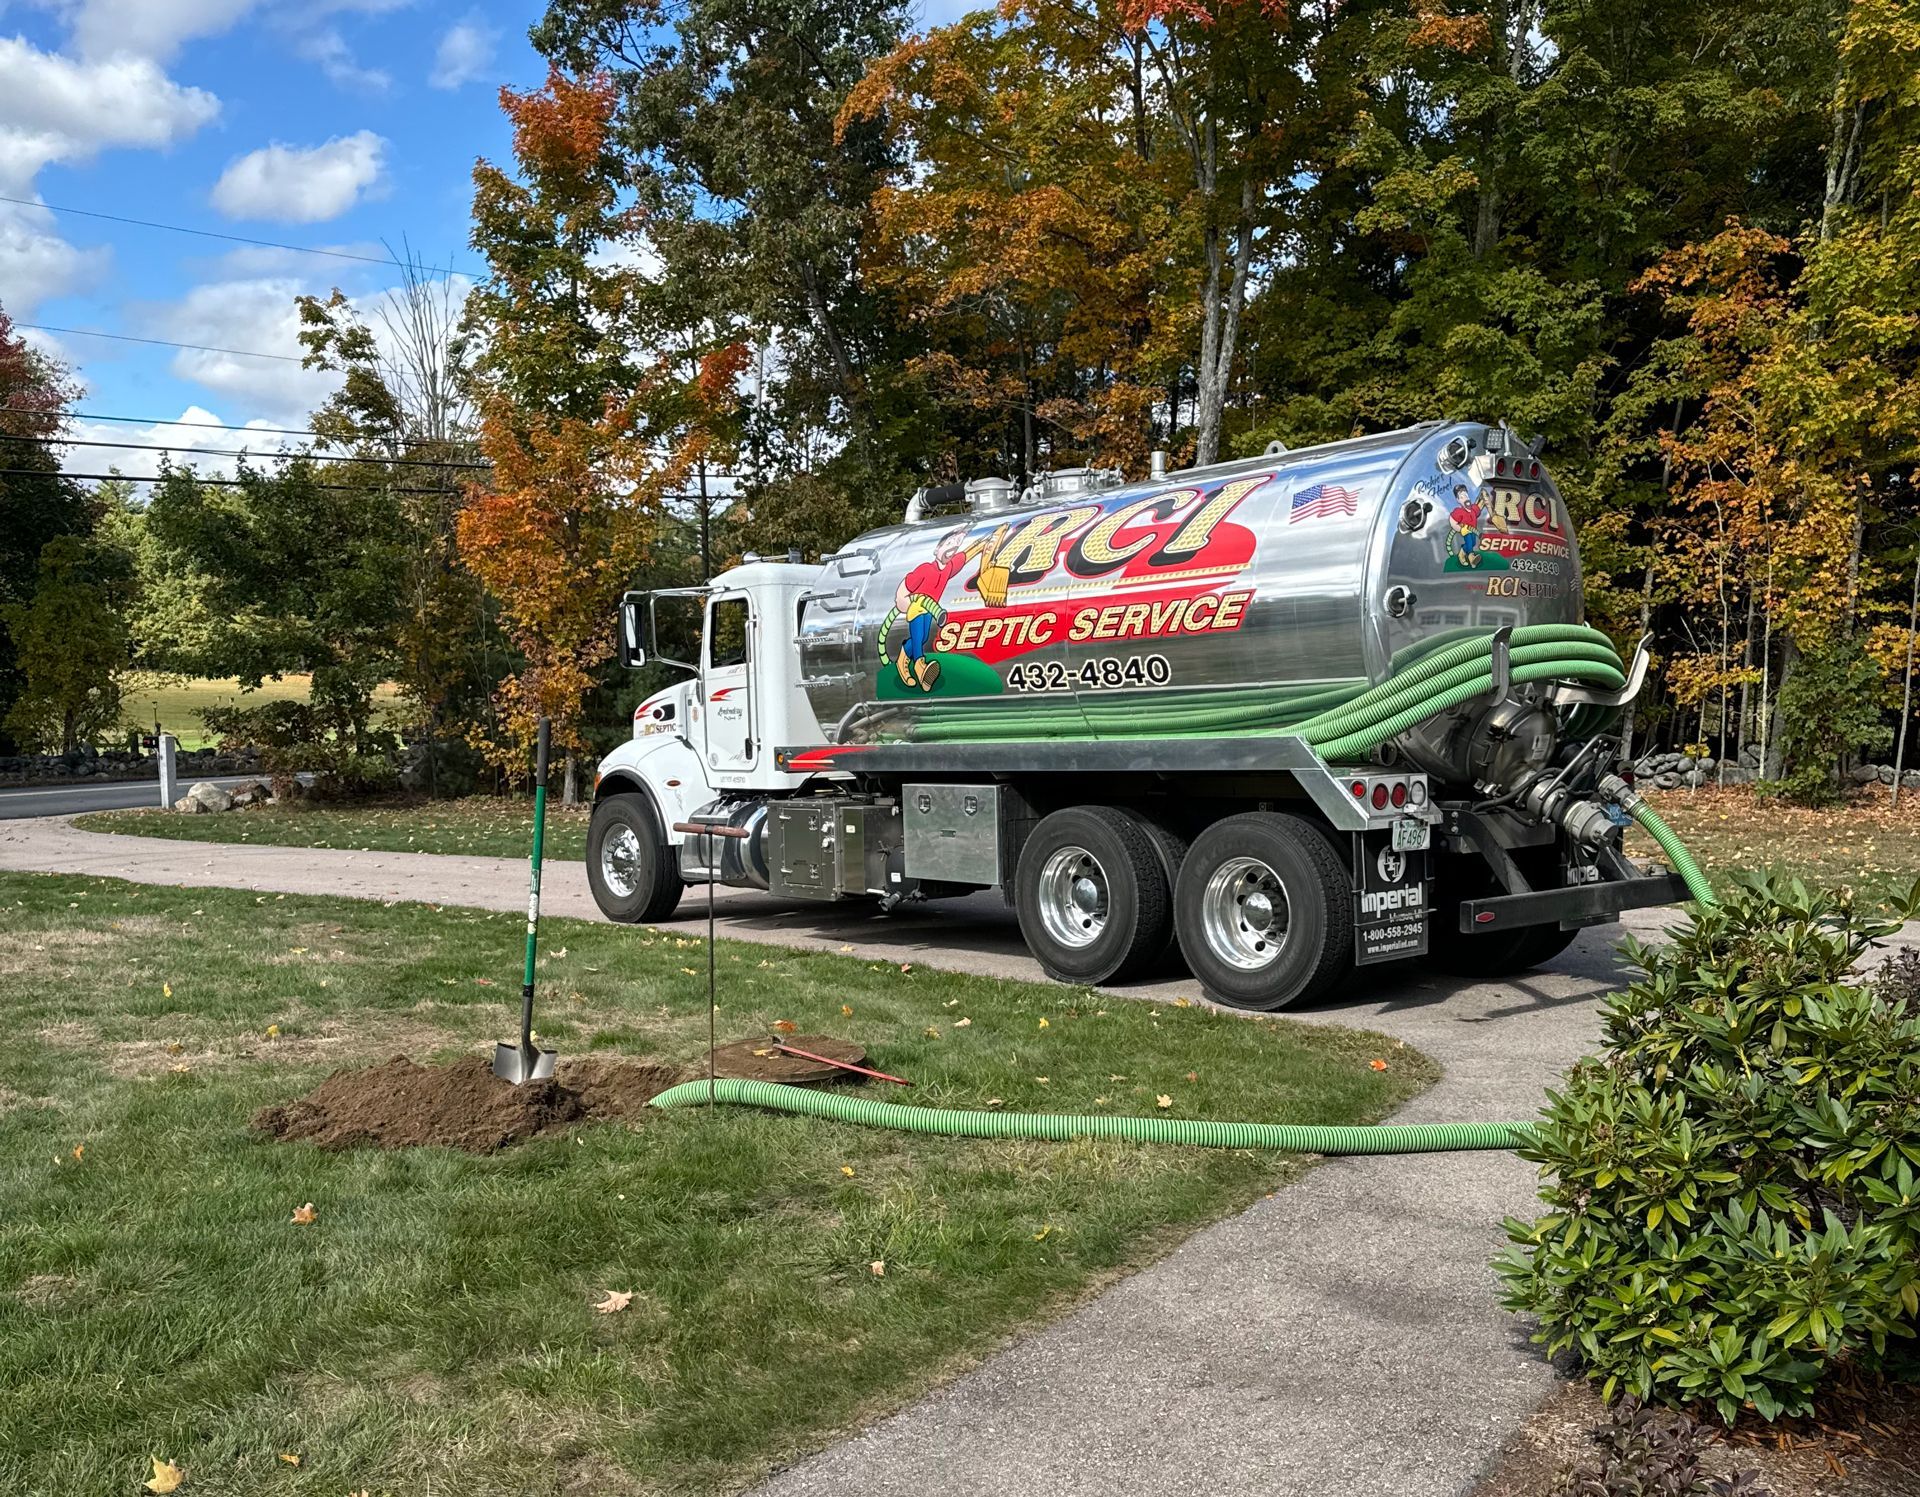
Phase 5: System Inspection
The State of New Hampshire inspects the system verifying all system components will function correctly. Inspection scheduling typically requires 24-48 hours notice, depending on inspector availability and local regulations.
New Paragraph
Inspection Process Details
Inspectors verify tank installation meets approved specifications, including proper depth, level placement, and structural integrity. They check that the tank is positioned correctly relative to the property, properly secured, and connected appropriately to both inlet and outlet piping. Pipe slope and connection inspection ensures proper drainage throughout the system and prevents future system failure. Even small errors in pipe slope can cause drainage problems or premature system failure.
Code compliance verification involves checking all system components against approved design plans and local regulations. Inspectors compare the actual installation to the permitted design, ensuring contractors followed specifications and used approved materials. The inspection process includes verification that the septic system meets all setback requirements and installation specifications. Inspectors may require corrections before granting final approval, potentially extending the timeline by several days while contractors address identified issues.
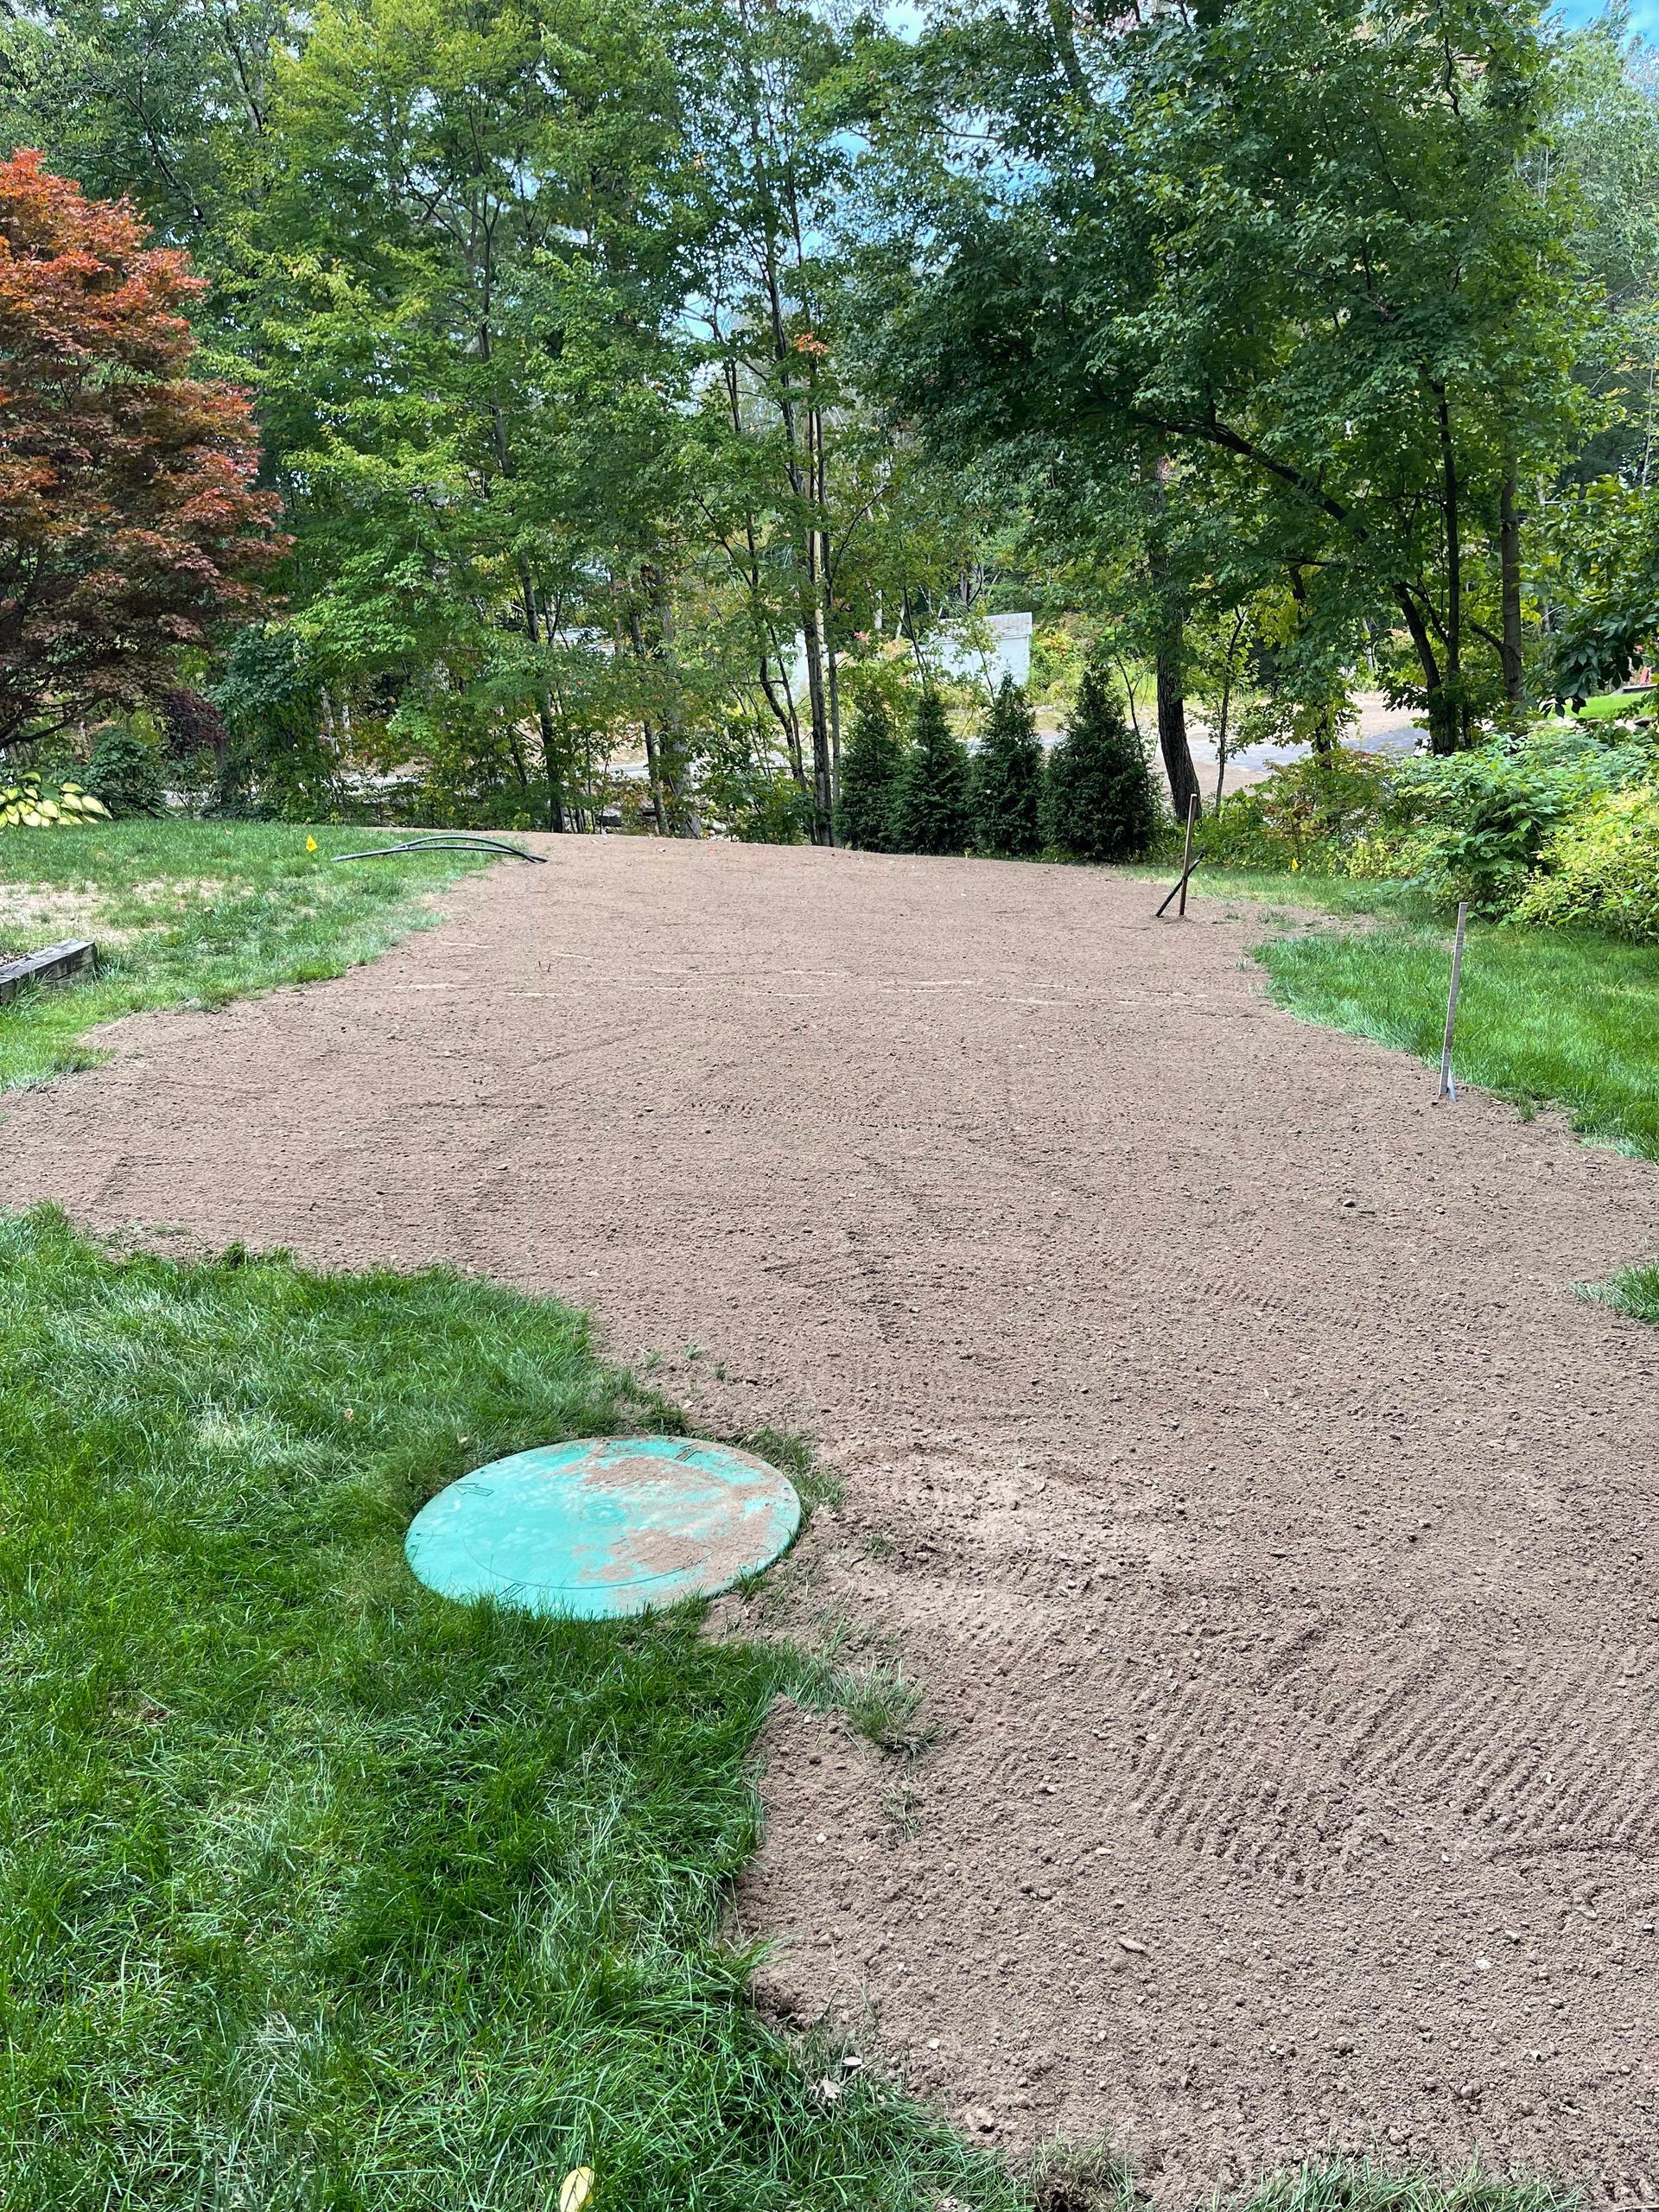
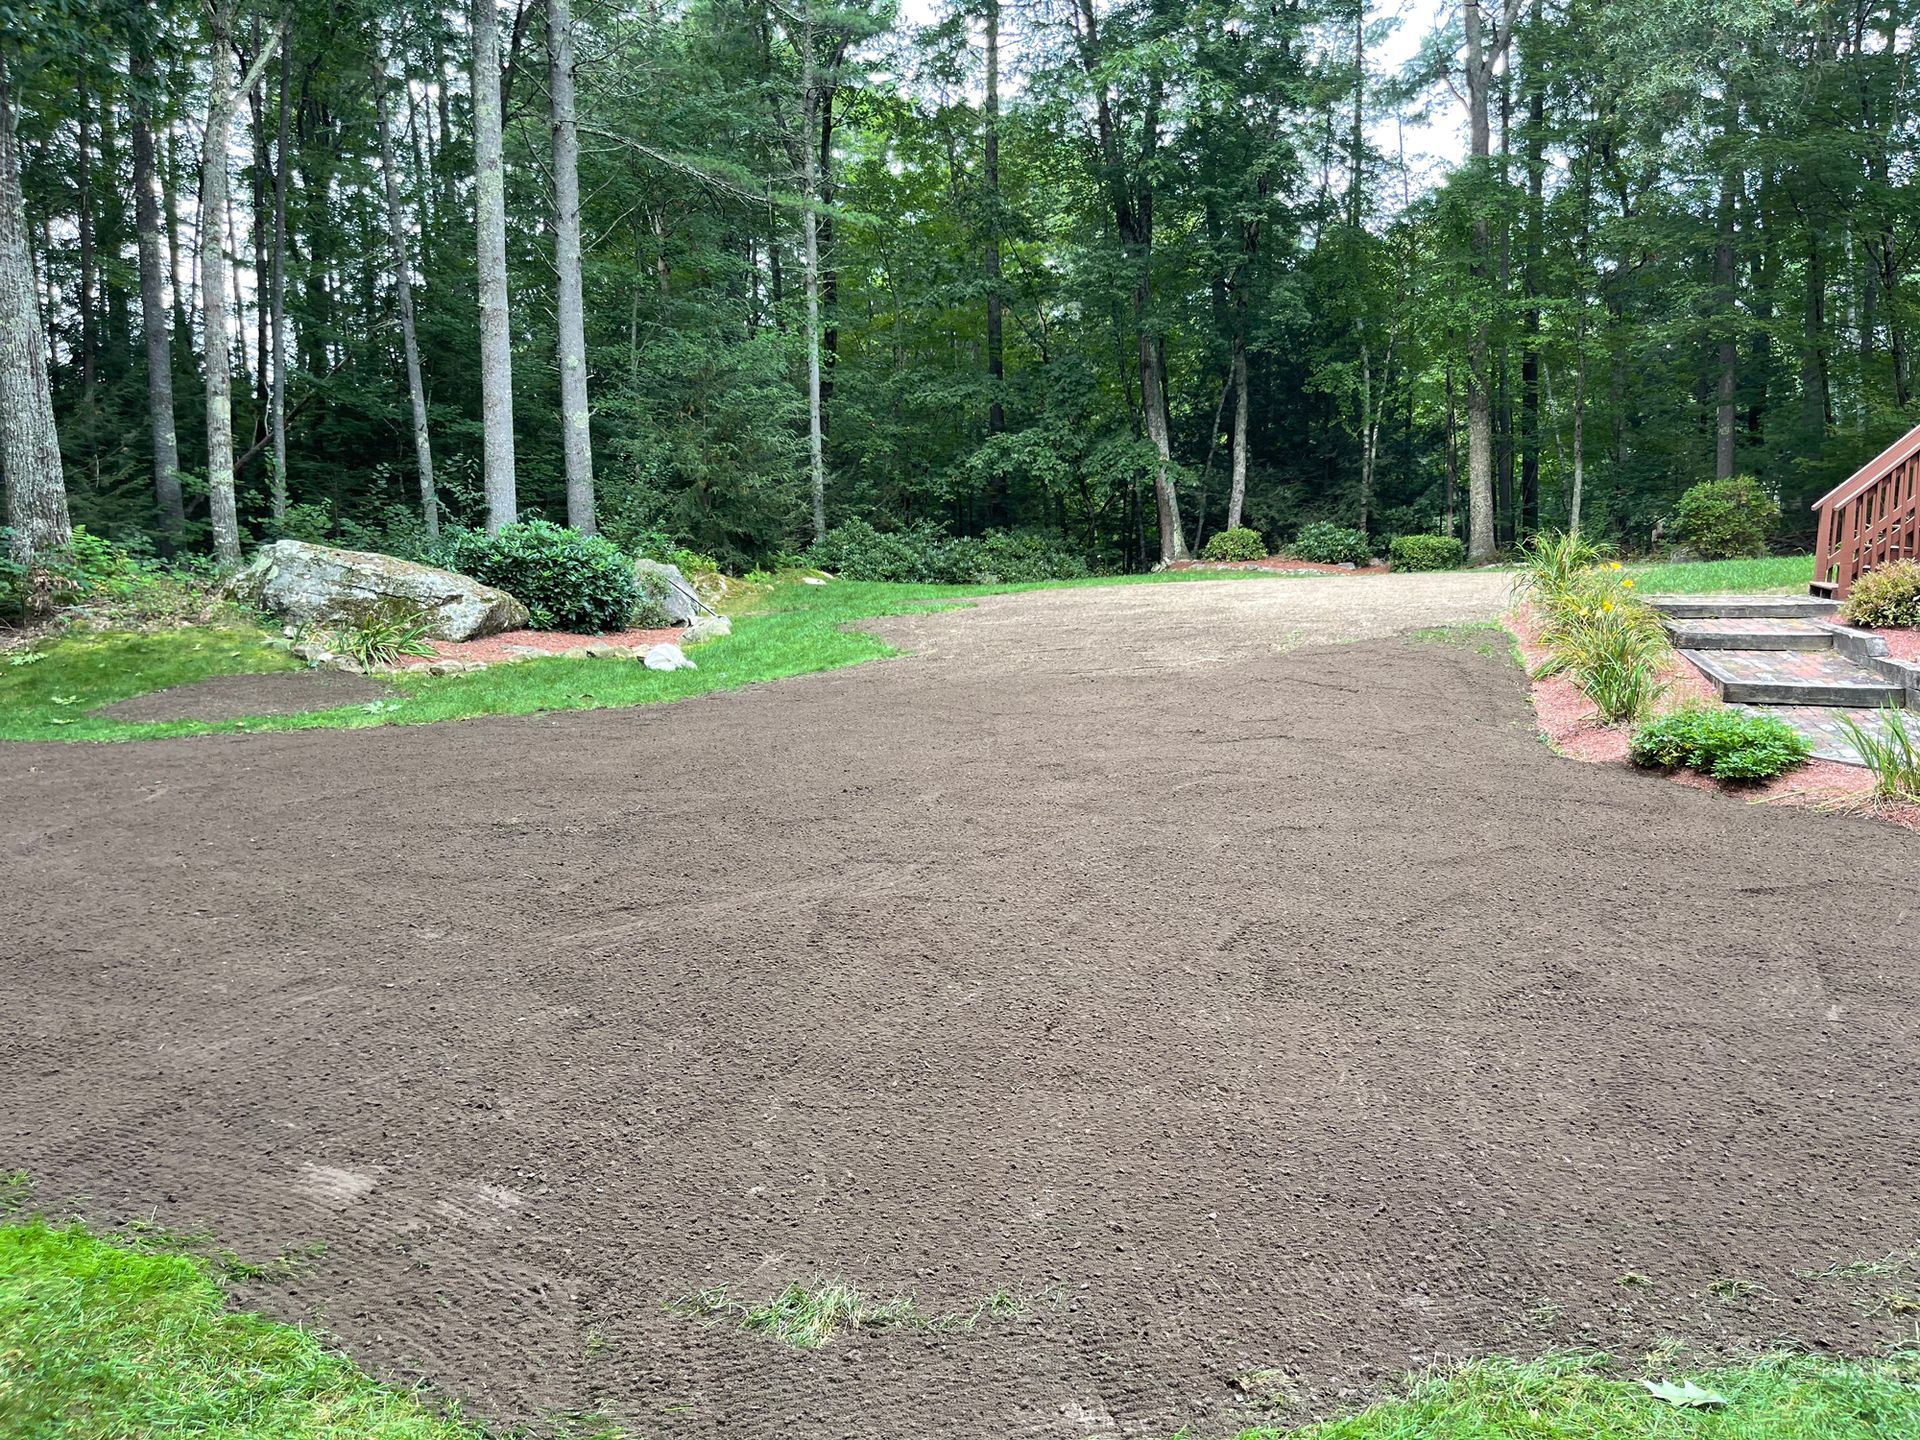
Phase 6: Backfilling and Site Restoration
Approved backfilling with proper soil occurs after the system is inspected and approved, using appropriate materials that won't damage system components. Contractors carefully place backfill material around the tank and pipes, avoiding large rocks or debris that could cause damage. Site grading and drainage establishment continues, ensuring surface water management that protects the installed system. Proper grading directs surface water away from the septic system, preventing excess water from entering the drainfield and overwhelming system capacity.
Topsoil application and seeding begins the landscape restoration process. Contractors spread topsoil over the disturbed areas and plant grass seed to prevent erosion and restore the property's appearance. Final site cleanup and restoration is done, returning the property to functional condition while preserving access to system components for future maintenance.
Backfilling Best Practices
Proper soil compaction techniques prevent settling that could damage tank and drain field components while ensuring stable surface conditions. Contractors compact backfill in layers, preventing voids that could cause excessive settling or tank movement. Protection of tank and pipes during backfill operations requires careful material placement and compaction procedures. Heavy equipment must be kept away from sensitive components, and backfill material must be placed carefully to avoid damaging pipes or disturbing tank alignment.
Drainage considerations around the system prevent water accumulation that could interfere with proper system function. Surface water should flow away from the septic system area, and landscaping should be designed to prevent pooling or erosion. Marking system components for future access ensures property owners can locate tanks, distribution boxes, and other components for maintenance activities. Permanent markers or records help prevent accidental damage during future excavation or landscaping projects, and make routine maintenance much easier.
Landscaping Considerations
Acceptable plants for septic system areas include shallow-rooted species that won't interfere with system components or create maintenance challenges. Grass is ideal for most septic system areas, providing erosion control without threatening system integrity. Root barrier installation may be necessary near trees or large shrubs to prevent root intrusion into system components. Even trees planted at recommended distances can send roots toward the moisture and nutrients in the drainfield, potentially damaging pipes over time
Erosion control measures protect the completed system from surface water damage while establishing permanent vegetation. Straw mulch, erosion control blankets, or temporary fencing may be necessary on sloped sites until grass becomes established. Future access preservation for maintenance ensures contractors can reach system components without extensive excavation or landscape damage. Permanent structures, paved surfaces, or deep-rooted plantings over system components can make future maintenance extremely difficult and expensive.
Maintenance Schedule Setup
Recommended pumping schedules vary by household size: yearly pumping for 5+ people, every 2 years for 3-4 people, and every 3 years for 1-2 people. Following these schedules prevents solids from accumulating excessively and potentially damaging the drainfield. Annual inspection scheduling helps identify potential issues before they require costly repairs or system failure occurs. Professional inspections can spot developing problems like deteriorating baffles, settling tanks, or early signs of drainfield stress.
Record keeping for warranty purposes maintains important documentation that may be required for future service or insurance claims. Keep copies of permits, inspection reports, installation invoices, and system diagrams in a safe place where you can find them when needed. Emergency contact procedures ensure property owners can reach qualified service providers when urgent issues arise. Have contact information for your septic service provider readily available so you can get help quickly if problems develop.
Factors That Can Extend Installation Timeline
Weather delays represent the most common timeline extensions, with rain, frozen ground, and extreme temperatures preventing safe excavation and installation activities. Wet conditions can make excavation impossible and create unsafe working conditions for contractors. Permit complications including design revisions and regulatory changes can add weeks to the approval process when initial submissions require modification. Sometimes regulations change during the permit process, requiring design updates before approval can be granted.
Site challenges such as poor soil conditions, high water table, or access issues may require alternative system designs or specialized installation techniques. Properties with difficult conditions may need engineered solutions that take longer to design and install. System complexity factors including pump systems, mound systems, and advanced treatment technologies extend both design and installation timeframes significantly. More sophisticated systems require additional engineering, specialized components, and more complex installation procedures.
Seasonal considerations affect installation scheduling throughout the year. Winter frozen ground conditions may prevent excavation entirely in cold climates, forcing homeowners to wait for spring thaw. Spring wet conditions and mud season access issues can make sites inaccessible or unstable for heavy equipment. Summer offers optimal installation conditions with faster timelines thanks to stable soil conditions and good weather. Fall provides good conditions before winter weather arrives, but shortening daylight hours and approaching winter weather create time pressure to complete installations.
Working with RCI Septic Service: Timeline Advantages
RCI Septic Service's 25+ years of experience streamlining the installation process helps minimize common delays through proper planning and coordination. Our team has installed thousands of systems throughout Southern New Hampshire, giving us deep knowledge of local soil conditions, permitting processes, and installation best practices. Established relationships with local permit offices expedite approval processes and reduce bureaucratic delays that often extend project timelines. We know what local inspectors expect and design systems that pass inspection the first time.
In-house capabilities reduce coordination delays by managing multiple project phases with the same team, ensuring consistent quality and communication throughout the installation process. When one company handles soil testing, design, permitting, installation, and final inspection, coordination becomes seamless and potential delays from miscommunication between contractors are eliminated. Backup equipment and crews help address weather-related delays and maintain project schedules even when unexpected challenges arise.
Comprehensive service from soil testing through final inspection provides single-point accountability and eliminates coordination issues between multiple contractors. You work with one team throughout the entire process, ensuring consistent quality and eliminating finger-pointing if problems arise.
Planning Your Septic Installation Timeline
The best seasons for septic installation in New Hampshire are late spring through early fall when ground conditions remain stable and weather delays are minimized. Late May through September typically provides the most predictable conditions for installation. Summer installations typically proceed fastest due to optimal soil conditions and equipment access, with minimal weather delays and long working hours allowing projects to move quickly.
Property preparation before installation begins includes clearing access routes, relocating temporary obstacles, and coordinating with other construction activities. Make sure contractors have clear access to the installation area, and remove or protect any landscape features you want to preserve. Proper preparation can reduce installation time by several days while preventing damage to existing landscaping or structures.
Coordination with new home construction timelines requires careful scheduling to ensure septic system installation aligns with foundation work, utility installation, and final grading activities. The septic system typically needs to be installed after rough grading but before final landscaping, and must be completed before the home can receive an occupancy permit. Budget considerations and payment scheduling should account for potential timeline extensions due to weather or site conditions. Most septic installations require payment at various milestones, with final payment due after successful inspection and system approval.
Understanding the complete step by step timeline of a septic system installation from permit to finish helps property owners plan effectively and set realistic expectations. Professional installation ensures proper system function, regulatory compliance, and long-term reliability that protects both property value and environmental safety. A properly installed system that meets all codes and regulations will serve your family reliably for decades with appropriate maintenance.
For detailed timeline planning and professional septic system installation services in the Londonderry, NH area, contact RCI Septic Service at https://www.rciseptic.com to discuss your specific project requirements and schedule a thorough site evaluation. Our experienced team will guide you through every phase of the installation process, ensuring your project stays on schedule and meets all regulatory requirements while delivering a system that will serve your family reliably for decades to come.